Power Apps - Customizing a SharePoint List form
 Using PowerApps to Customize a SharePoint List Form
Start with a SharePoint List you have created SharePoint Online. In SharePoint Online Modern experience list or document library you can see the PowerApps option in the command bar. From the PowerApps dropdown click on Create an app.

How to create an Microsoft PowerApp with an existing List
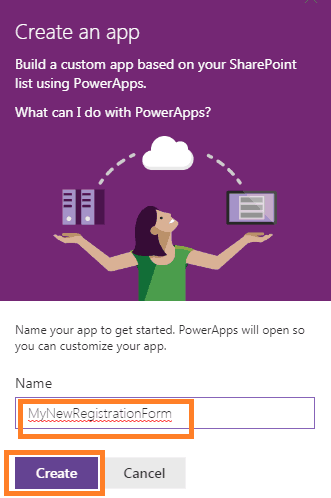
You will now see the Create an app page. Assign a name for the application. Then click on Create.
Wait for Some time while the application is building.
Building PowerApps
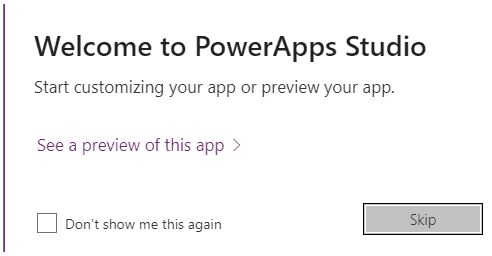
One popup Welcome to PowerApps Studio window will come asking for See a preview of this app and Skip. If we want to see how our application looks then click on Preview this app otherwise click on Skip.
PowerApps Welcoming Page
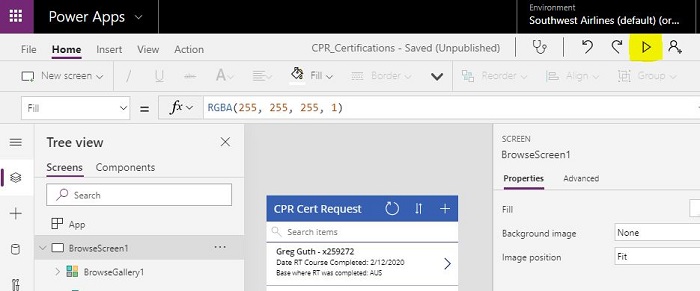
When clicking on Skip we can able to see the designer page. Where you can customize our application form. In the PowerApps designer page, you find various options to customize our form. Under the Insert option, you can see different controls like button, textbox etc. You can change the look of the form such as background color font size.
The mobile version form starts out complete and operational right away. It will immediately give you 3 screens; Browse, Edit and Detail screens. If your form comes up with fields you are not wanting to see on your form you will want to go to the Modifying Form Fields section
Click on the play button and you can see a Preview of the Application.
PowerApps Designer Page
Note: Creating your form from a SharePoint list will give you a fully functional application already connected to that list data. If you need User Profile information also on this form, you will need to add User Profile data manually. Most SWA forms have User Profile data displayed in the heading or at the top of the forms.
Note: If you want to build a SWA approved heading on your form the steps in doing this are defined in Form Customization.
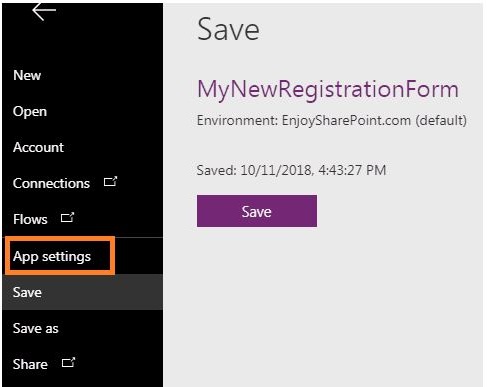
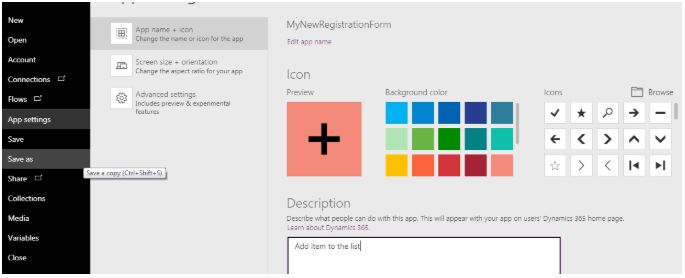
Before you save your form, click on Form Settings on the left navigation. You will get the below page.
PowerApps Application Settings
Here I have changed the icon and changed the color of the icon. Then I have added some description and then click on Save.
Note: you can also upload custom images for icons, the recommended size for these images is 225X225 pixels.
PowerApps Settings and Icon customization
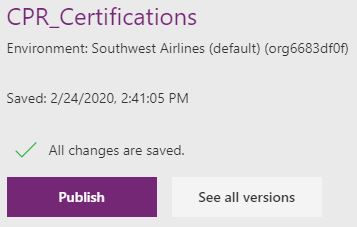
To save the new icon and form click on Save, on the left navigation. You will then see Publish. To publish the PowerApps click on Publish.
Publish the Application
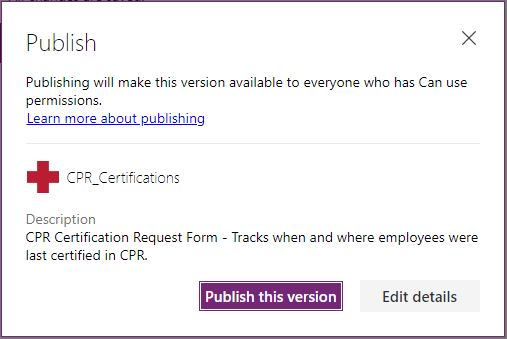
After you click Publish one more page will come asking for confirmation. Click on Publish this version.
Publish this PowerApp Version
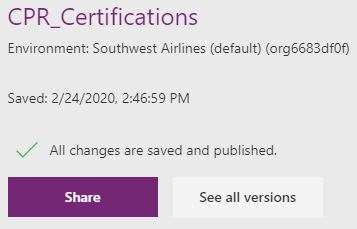
After successfully publishing the app it will ask if you want to Share the application. Click on Share.
Sharing PowerApp with other users
After sharing your application with other users you will go to the Apps page. Here you can see all the details about the application such as Owner, Created Date, Modified Date, Web Link and App ID.
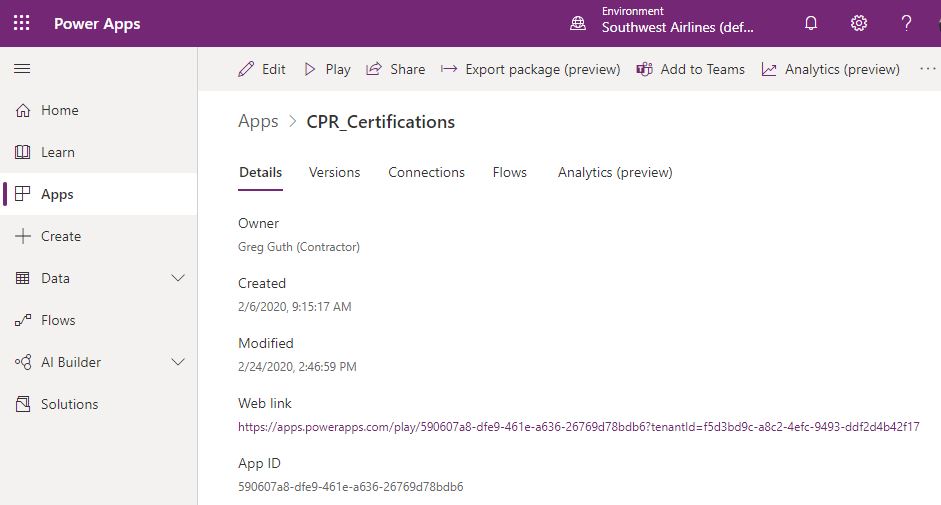
PowerApps Details
Note: You will need this Web Link if you want to link to your application from any website or SharePoint site. You will need the App ID for embedding your Power App into a SharePoint page. This is further explained on the Embed Power Apps in Page