Power Apps - Upload file to SharePoint Online document library
 Upload file to SharePoint Online document library
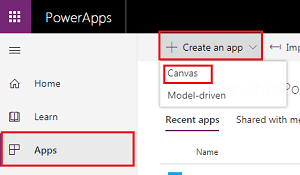
First, Sign in with your credentials in "PowerApps.com". Go to the App launcher-> Click on the Apps. Next click on Create an app -> click on Canvas.
Select the Phone layout from the Blank App template.
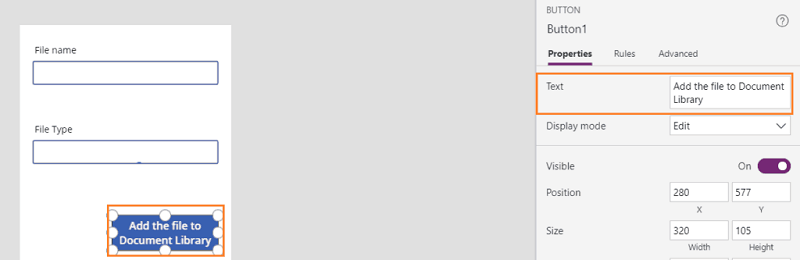
Add two labels and two input controls and one button click. When we enter the file name and file type in the PowerApps designer page and click on the button, a file will automatically get created in the SharePoint Online document library.
Add one label from Insert-> Text in PowerApps designer page. Click on the label which comes under the "Text Control". After the label is added we can see the label name in the left side panel. Change the Property of Text to "File Name" on the right side panel.

Now add one text input from Insert->Text in the PowerApps form.

Add one more label and one more text box. Changed the Text property of the second label as File Type in the PowerApps form. Add one button control(Insert->button(comes under Controls). I have Changed the Text property of button click as Add the file to Document Library.
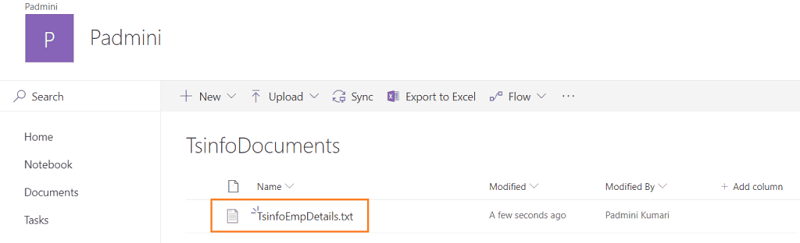
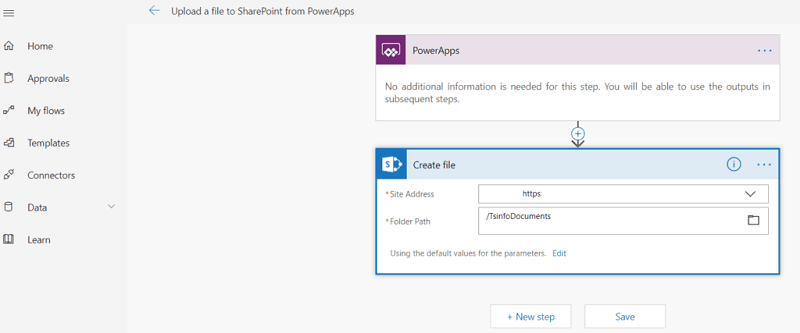
Create a Document Library in the SharePoint online site, where we want to save the created the file using the Microsoft PowerApps. I have created the SharePoint Document Libray called TsinfoDocuments.

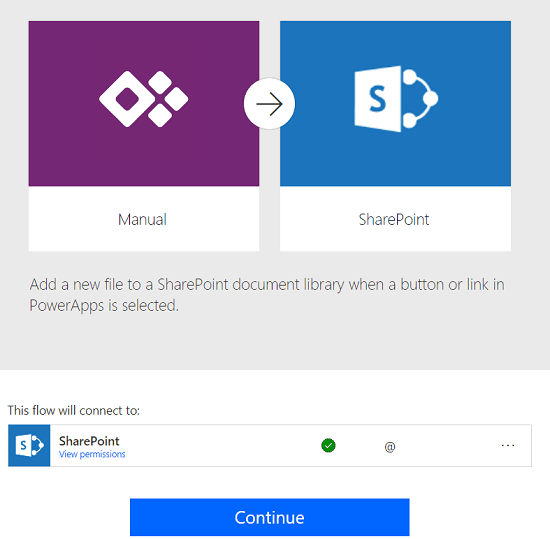
Open the link Upload a file to SharePoint from Power Apps. Check if this flow is connected to SharePoint, if it is connected then, click on Continue.
In the next page give the SharePoint online URL to the document library. In the Folder Path field, choose the document library where we want to save the file from the PowerApps form.
Click on Save. Now our flow will be saved. Remember the flow name it will be useful while connecting the flow with PowerApps in the PowerApps designer page.
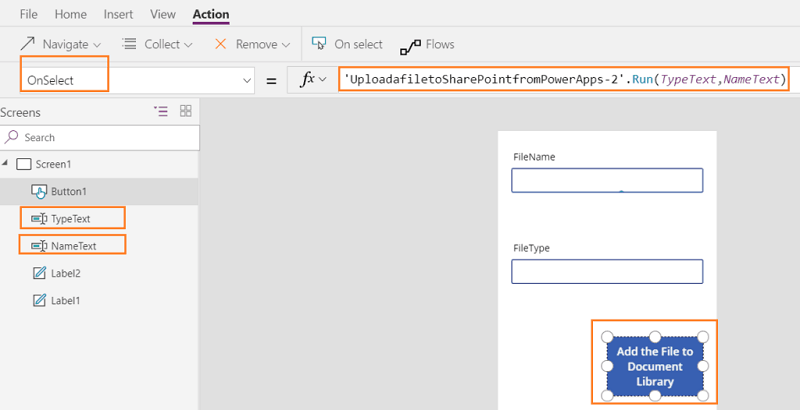
Open the PowerApps designer page. To connect the flow with the PowerApps page, go to Actions->click on Flows.

Now we will see all the Microsoft flows. Select the flow which We created using the tool. When we select the flow then in the rule bar automatically rule will be added for Button, select OnSelect property in PowerApps form.
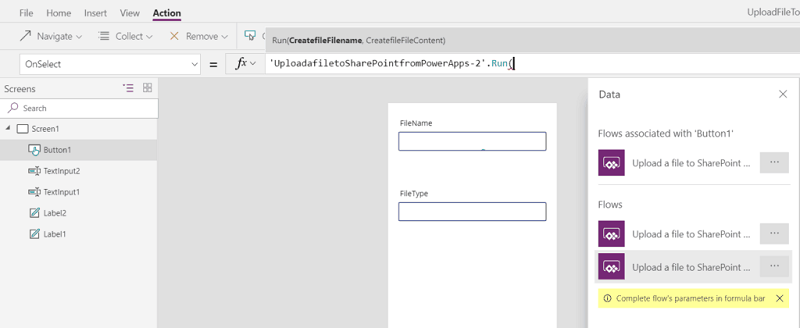
In the Rule bar, Add The rule UploadfiletoSharePointFromPowerApps-2.Run(TypeText,NameText). Change the "text input 1" name to NameText and "text input 2" name to TypeText) in the PowerApps designer page.
Adding Validation message to Power Apps input Textbox:
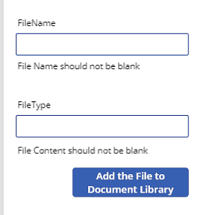
We want to add error messages, error handling. When the user leaves the fields blank, it will show an error message in the PowerApps form. To show an error message add one label control.
Select Text property from the dropdown and add the rule as "If(ISBlank(NameText), "File Name should not be blank".I have added one more label to another textbox. Select Text property and added the rule ( If(IsBlabk(TypeText), "The file type should not be blank" ) in the PowerApps designer page.
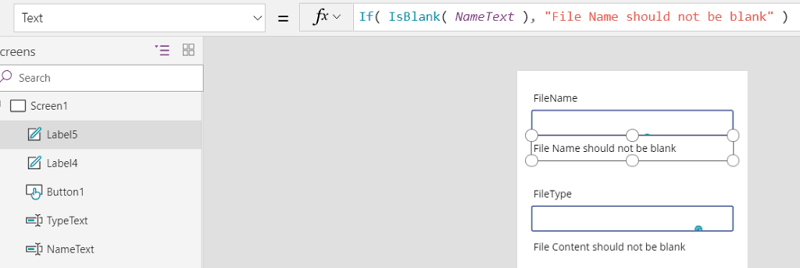
When we Preview the PowerApps form, the error message appeared below the text boxes because they are empty. It is showing the message until you enter data into the text box.
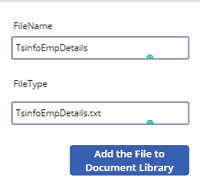
Enter the file name and file type in the PowerApps form. Here I want to store the file as type ".txt". So Enter the file type as "TsinfoEmpDetails.txt". Click on the button to save the file to SharePoint online document library.
Now, the file is added in our SharePoint Online Document library.